The First Step
The Basics of Android is for beginners who have just started or want to learn android programming.
In this page we will see how to start an android project.
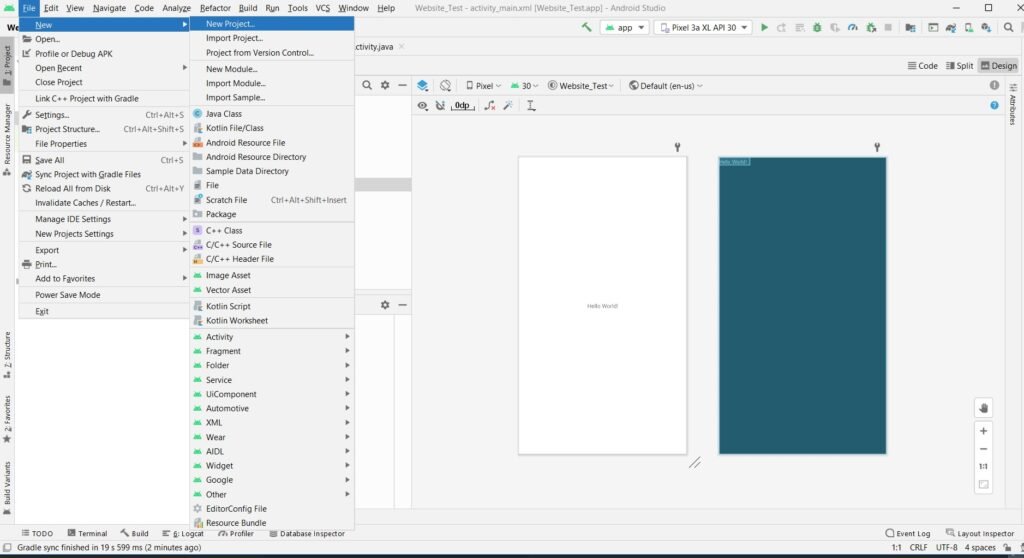
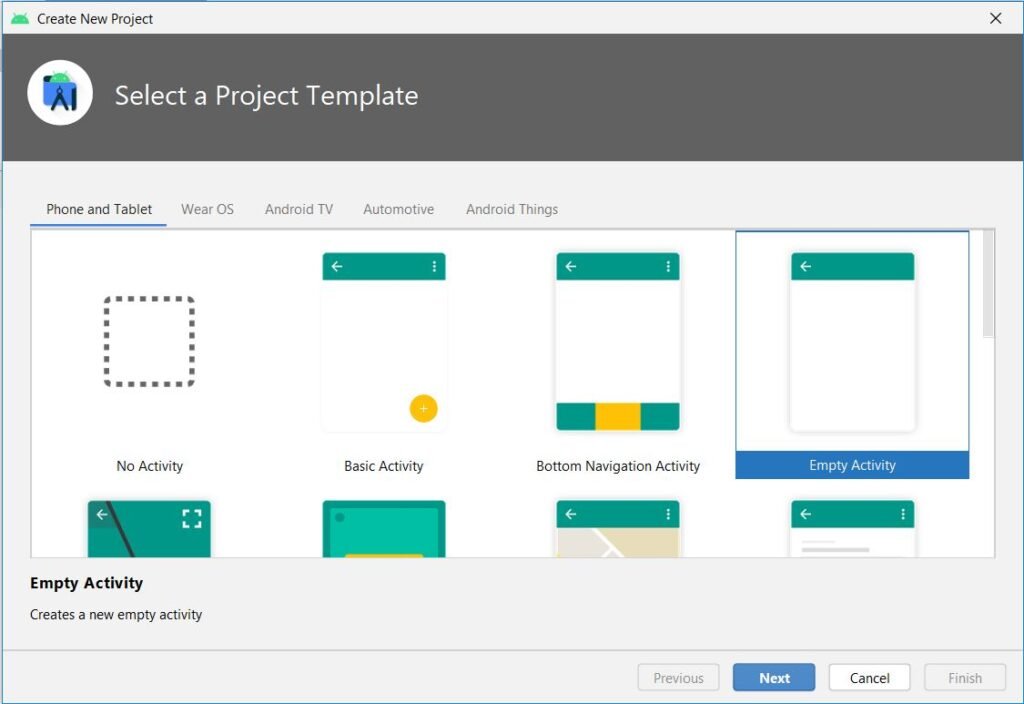
Step 1: Open android studio, click on File, select New, Select New Project. This will open a window to allow user to select a template for their android project. For demonstration purpose we select empty activity.
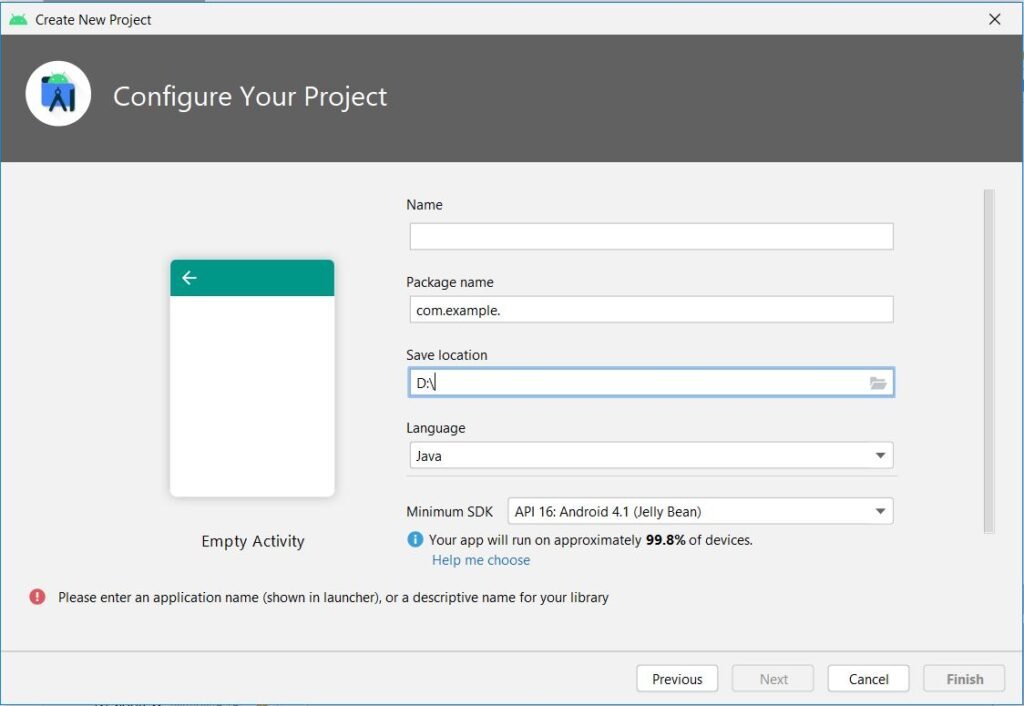
Step 2: Once the user selects project template, click next. In the next window, users are asked to fill the details such as project name, location where project is to be saved, programming language (either java or kotlin), Minimum SDK (the minimum android version required to install on the device). After filling all the details, click on the Finish button. This will start a new project in android studio.
Step 3: Know your project window.
When the project window is opened, it will look similar to the image below.
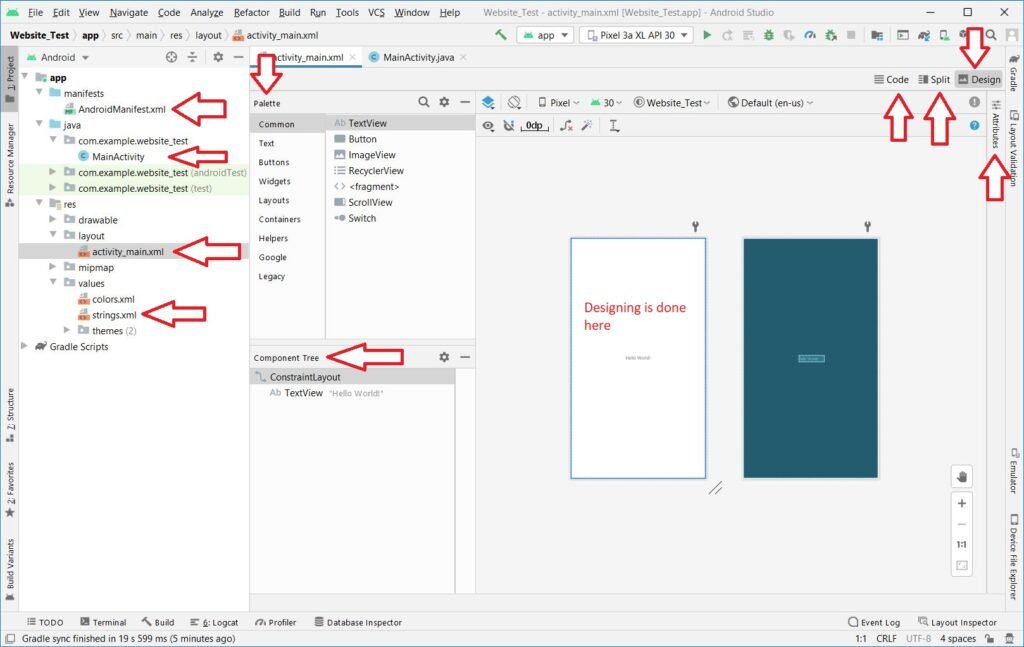
The image shows most probably all the parts of the window which may be used by the user such as AndroidManifest.xml file, MainActivity (java file), activity_main.xml (used for designing the app either using GUI or using the code), strings.xml, Palette window (from where we will drag and drop GUI elements on to the designing window), Component Tree (which provides the tree structure of the design such as Layout, GUI elements used and their hierarchy), buttons to open Code window, Design window, Split window (both code and design), Attributes (used for setting the attribute values for each GUI components).
Step 4: Designing an app.
Designing an app in android studio is very simple and easy. First the user must decide on how the app should look like, what are the GUI components should be placed and in which order. Once the design part is finalized, then user can start designing the app by placing the GUI components on the design window from the Palette by drag and drop on the design window.
There are different types of layout, but for time being we will consider the constraint layout. When we place any GUI component on the design form, it gives a warning saying “This view is not constrained. It only has design time positions, so it will jump to (0,0) at runtime unless you add the constraints”. It means that, when we run the app, all elements in the design we be placed at the top-left corner placed one over the other. In order to avoid this, we must specify the constraint in at least in two directions (horizontal and vertical).
First, user can open the design window or blueprint window or both by selecting the option from Select Design Surface.
Any component placed on the design window can be resized using the resize handle. And constraint can be set in two ways.
- Using the Side Handle.
- By setting margin (left, right, top, bottom) from Attributes →Layout.
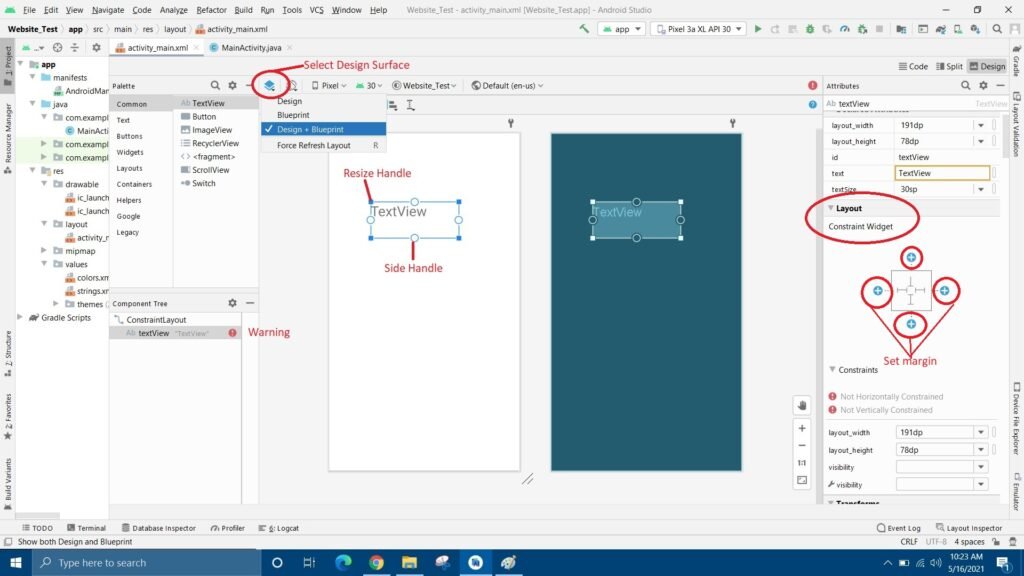
Deleting a constraint is also very easy. Using side handle, select the constraint, press delete button. To delete using Layout, already set constraint will be shaded, on moving the mouse over the shaded circle, cross symbol ⊗ will appear, just click on that symbol to delete a constraint.
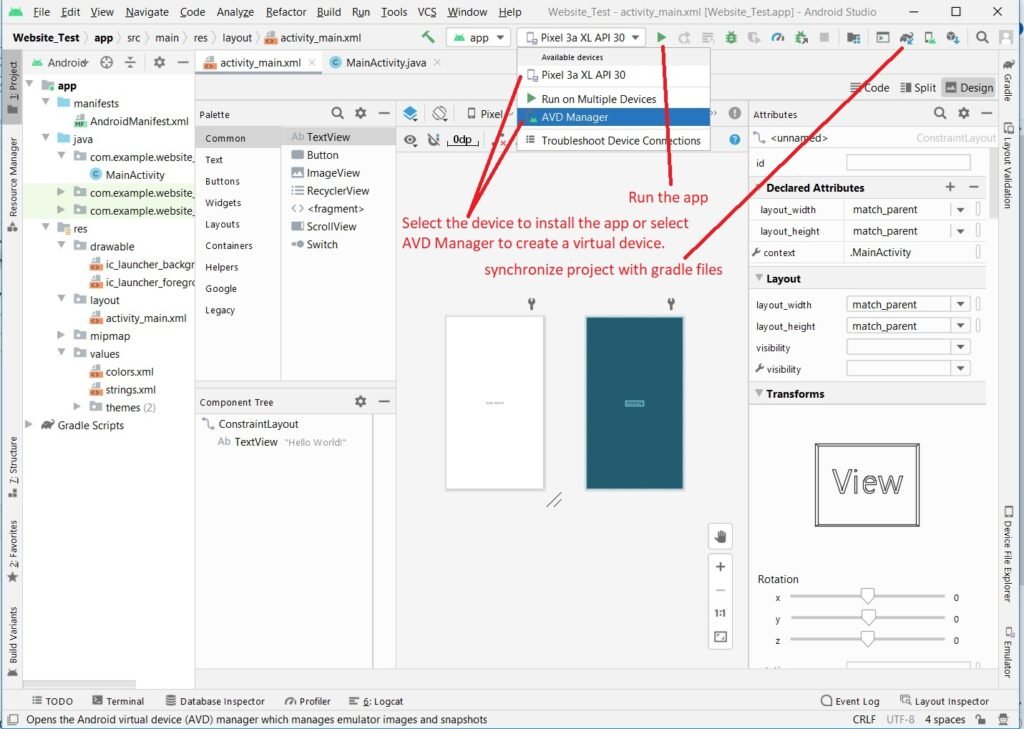
Step 5: How to run/install app
As shown in the image, one can run the app by clicking the play icon. But, in order to run the app, user must either connect a device to the laptop/desktop using the USB cable or they can install a virtual device using AVD Manager.
If the virtual device is already installed or a physical device is connected, it will be shown in the drop-down menu. If the user wants to create a virtual device then, they must click on the option AVD Manager.
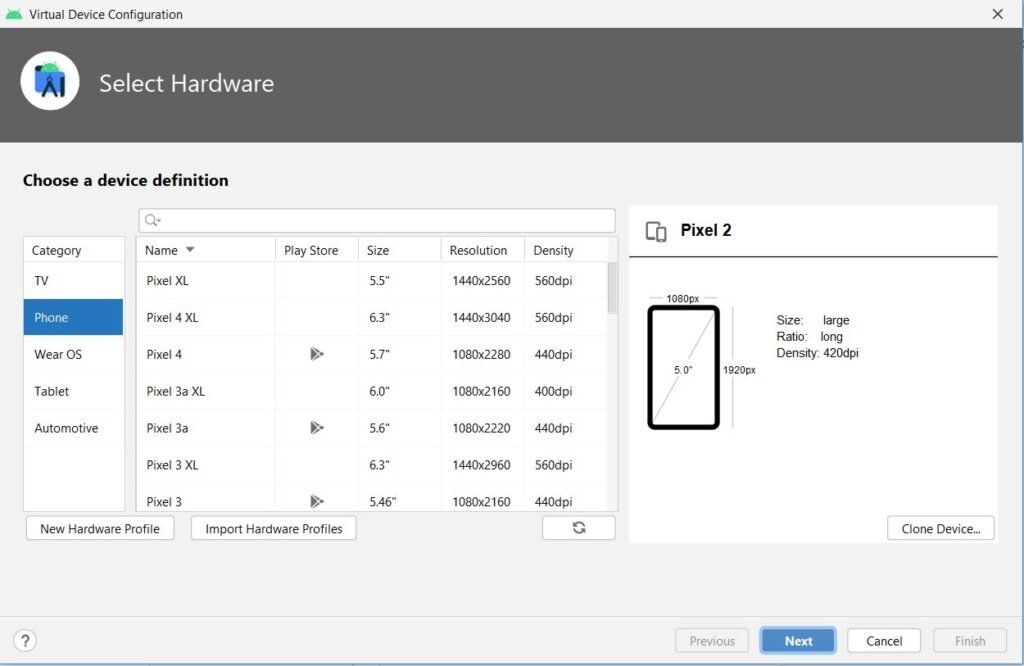
When the user clicks on the option AVD Manager, a new window to create virtual device will open as shown in the below image.
If a virtual device is already installed, then it will be displayed (Example Pixel 3a XL). If user wants to create a new virtual device, click on the option + Create Virtual Device.
On clicking on Create Virtual Device, it will open a window where user must select a category, and then the device which they prefer and click Next. This will take user to the next window where user must select the system image and click on the Download. This will download and install the device. Click Finish to complete the installation of virtual device.